I’ve learned quite a bit through my experiences with the PDB and EMPIAR deposition processes of ligand-bound ribosome CryoEM data. The below are some of my guidelines and tips for how to make going through these two deposition processes less confusing and/or frustrating.
Part 1: PDB deposition
This blog post assumes you have a finalized map and model ready for deposition.
There’s a lot of information below. Here’s the short version, which will serve as a refresher after having read this post in full:
- Choose the right coordinates file format (.pdb or .cif) for the size of your model
- Run BLAST on each chain, pick the best match, and update sequence with non-standard residues
- Have your data collection and processing information from your Table 1
- Have your ligand’s SMILES string
- Resolve outliers and clashes denoted in the Validation report before submitting
- Review analysis report, make corrections, reupload a file or approve for deposition
Opening a deposition instance
Go to the PDB’s wwPDB Deposition Service and start a new deposition. Select your country and then answer the questions below. In this example, we’re depositing a single particle electron microscopy structure; we’re depositing coordinates (that’s the model), and the associated map has not previously been deposited. You’ll get an email with login details.
Note that you will need to open a new deposition account for each map/model pair you plan to deposit.
Uploading map, model, and png thumbnail
Along with the map, you need the calibrated pixel size from the data collection (which, if you haven’t binned your data, is equal to the voxel spacing) and a recommended contour level. For the recommended contour level, open the map and model in Coot, zoom in on the ligand, and adjust the map’s contour. Record the sigma of the map that produces the best clarity for observing the ligand’s density.
The model you upload can be in either PDB format (.pdb) or mmCIF format (.cif); for information on model refinement using PHENIX with the OPLS3e force field, see my Benchling protocol here. If you upload a .pdb, it must meet PDB naming requirements, and there must be a “TER” line after each polymer chain. The most relevant PDB naming restrictions for ribosome models are: 1) chain names can only be one letter long and 2) atom names cannot have letters in them. For small ribosome models, these likely won’t be an issue; however, larger ribosome models with many chains and atoms will run into these issues. The easiest way around these is to convert the model to mmCIF format, which supports these naming schemes. Open the model in PyMOL, save it as a .cif, and upload this model file to the PDB deposition service.
- Be careful if you were working with a .cif ribosome model containing chains with two-letter names (such as chains AA, AB, AC) and saved it as a .pdb. These chains will all be renamed to chain A. You’ll then run into such issues as “chain A has multiple atoms with the same name”.
- This is relevant to you if there are more than 99,999 atoms in your model, because then atoms will start getting named with letters, such as “A0000”. If this is in your model, you’ll get a “ERROR: ‘A0000’ is not a number.” flag when you try to upload your model to the PDB deposition service.
Don’t overthink the thumbnail. I used the same screenshot of my ribosome map, shown as a surface, in Chimera as my thumbnail for all my ligand-bound ribosome models.
When you submit these files, PDB validation will run on the model you uploaded. You’ll get an email when the validation report is ready to look at. More on this file later. Know that you can also run this validation on any model with the wwPDB Validation Service.
Completing the “Admin” section
This section is straightforward. Note that, after filling in all this information once, you can choose to copy it to a new deposition instance.
Getting complete nucleotide and amino acid sequences for your model
In the “Macromolecules” section, you’ll need to submit names and sequences for each polymer chain in your model following these directions:
Input the sequence of this molecule using standard one-letter codes. Please include the complete sequence including tags, linkers, unobserved regions and mutations. Non-standard residues should be input using the three-letter code in parenthesis, e.g. (MSE).
It’s okay if the sequence you input has extra residues (this will be the case if the model you’re depositing has truncated chains or residues missing); however, the sequence you input cannot be lacking residues or ligands in the model you’re depositing. That means you need to include the three-letter code(s) for the ligand(s) in your model.
I stress that this sequence should be the complete sequence of what is found in nature. To get this:
- Run
phenix.print_sequence model.pdb > seq.txt to extract the exact sequence of your model to a text file. Most of the time, the sequence in your model is incomplete, so do NOT use this sequence in the deposition. (If you do, you’ll probably get asked about it in the review, but better to be right the first time.) This output file will be in FASTA format. Annoyingly, all non-standard RNA residues will be represented with “?”. Currently, manually editing these to be in three-letter code with parenthesis, such as “(6MZ)”, is the only way I know to correct these. (Although you can do the next step without editing these “?”, you’ll need to edit them eventually. When I do this, I’ll have the model open in PyMOL with the Display Sequence on.)
- Run a BLAST sequence alignment search. Although you can do BLAST searches with multiple FASTA inputs at once, I think it’s less confusing to do each polymer chain sequence one at a time. Select which BLAST search is appropriate for your sequence, either BLASTn for nucleotide sequences or BLASTp for ribosomal protein sequences. When the search is done, select a sequence with the greatest percent match that also accurately describes your sample. Click the GenBank link next to the sequence range for the alignment. This will bring you to an NCBI page. Click the FASTA link to get the sequence of the aligned region in FASTA format. Copy this FASTA and keep it, along with the weblink, in your records.
- Edit this FASTA sequence: change all “T” to “U”, update any non-standard RNA residues to have their name in three-letter code enveloped in parenthesis, and, if this chain has your ligand(s) bound, add the ligand(s) name in three-letter code enveloped in parenthesis.
- Input this sequence into the PDB deposition service. You can find suggestions for the chain’s name from the BLAST search. Examples of what I’ve used: 23S ribosomal RNA, 50S ribosomal protein L2. After pasting the sequence in, you’ll need to click the button to align it.
- Below this section, you’ll specify how the molecule/sample was obtained (e.g. purified from natural source) and what it is (e.g. Escherichia coli, Taxonomy ID 562).
- Repeat steps 2-5 for all other polymer chains.
Adding details of your collection
The data collection sections, e.g. “EM sample” and “EM experiment” tabs, are straightforward. Many of these details will be values already in your Table 1.
Addressing your ligands
In the “Ligands” section, you’ll specify which ligand is the study’s subject of interest (non-standard RNA residues will also appear among this list) and include a few additional details. I recommend submitting your ligand’s SMILES string among these.
For the ribosome, your model is likely C1, having no symmetry (might be different if yours is a crystal structure). If this is the case, then yes, your assembly applies to all chains and yes, the assembly can be generated without applying matrices.
The “Related entries” section is straightforward.
Reviewing the Validation report
There’s a lot of information packed into this report. Here are some especially important things to look out for:
- Percentile scores: these bars should be in the blue
- Outliers: bond length, bond angle, chirality, planarity, and Ramachandran
- Cis peptides
- Clashes: because the ribosome is huge, you’re bound to have a lot of these. I recommend running Validate → Probe Clashes on your model in Coot and focusing on the pink clashes near the ligand and those that are especially bad.
- Ligand: you’ll need to wait for your submission to be reviewed before you can see all the details for this
Submitting your entry for deposition
Your job isn’t done when you submit your entry. You will be unable to edit the deposition instance until your PDB deposition contact reviews your submission and reports back to you. Once you submit, you’ll receive a PDB ID and an EMDB ID, if your map was obtained through electron microscopy. Don’t forget to add these accession names to your Table 1.
Reviewing the extended Validation report and closing out the deposition
When you receive this report, read over it, address anything flagged as potentially being wrong, and ensure that the rest of the information listed is correct. Open the extended Validation report and ensure the stereochemistry of your ligand is correct; if you gave your SMILES string, it’s unlikely this would be wrong, but still it’s better to check. At this point, you can still make any necessary changes to your model and reupload it, going through the process of validation again. If everything looks good and you’ve confirmed it, then there’s nothing else to do. Remember that you can always ask to have your deposition instance unlocked so you can make changes in the future. Uploading a new map or model will put you through the validation cycle again.
Part 2: EMPIAR deposition
EMPIAR, or the Electron Microscopy Public Image Archive, is a public resource for raw electron microscopy movies, images, image stacks, particles, class averages, and more.
Opening an EMPIAR deposition instance
Go to EMPIAR’s deposition home page to register your user account or to log in. Unlike the PDB, where you need to make a new deposition login for each structure you want to deposit, everything in EMPIAR is connected to one login. Once logged in, you can click the link aptly called “Create a new deposition” to get started. Note that EMPIAR has an extremely helpful pictoral deposition manual available to you. I found it exceedingly useful and clear.
Once you’ve created a deposition instance, you have 3 main jobs:
- Fill out all the citation, entry title, and authorship details (and upload a png or gif thumbnail)
- Upload your data
- Fill out the image set format specifications
Job 1 - Complete the Deposition overview
This is the first page you’re brought to when you make a new deposition. If need be, you can navigate back to it by clicking the “Deposition overview” link on the left under “Deposition-related tasks”. This section is straightforward. Note that, after filling in all this information once, you can choose to copy it to a new deposition instance.
Also note that nearly every section is required to be filled out. If you don’t have the information or if the section isn’t relevant, click “N/A”. This will allow you to Save & Validate successfully and move on. You can only upload your data once you successfully validate.
Job 2 - Upload your data
After having completed Job 1, you’ll be able to upload your data. There are 3 ways to do this: Globus, Aspera using the command line, and Aspera using the web interface. I completed all my data uploads using Globus. To use Globus, you’ll have to make your own account and download Globus Connect Personal. You’ll need this software to establish an endpoint on the computer which houses your raw data, from which the transfer will be made to an EMPIAR endpoint.
Following the steps on EMPIAR under the Globus upload section is quite straightforward. I’ll reiterate their instructions to emphasize that you must be logged into your Globus account before trying to access their endpoint. Then, you can follow the links on EMPIAR to access their endpoint, log into the unique EMPIAR endpoint using the username and password they provide you, and transfer your data. Remember that you must have your home endpoint activated in order for you to be able to transfer anything.
Many types of raw EM data can be deposited to EMPIAR, including movies, images, and image stacks. If you’re depositing movies, it’s required that you include the appropriate gain reference for each set of movies. Include a dark reference and defects file if available, but these are optional.
Under “Deposition-related tasks”, you’ll now see an “Associate image sets with the data” section. Here, you’ll fill out some specifications, including the kind of data you’re uploading (e.g. multiframe micrographs), the format (e.g. TIFF), and the image and pixel sizes, among other details. If you don’t have these values on hand, most can be found in the header of your file. One potentially curious spec is the voxel type. If you don’t know what your voxel type is, you can use header from IMOD, identify from ImageMagick, or the header flag -H from EMAN2 on one of your files to discern it. If your voxel type (also called “data type”) comes up as “unknown” by IMOD, try ImageMagick. For an unknown reason, the latter worked for me and not the former.
Submitting your entry for deposition
Your job isn’t done when you submit your entry. Once you submit, you’ll receive a public EMPIAR ID. Don’t forget to add this accession ID to your Table 1. Your entry will be reviewed and, once complete, you’ll have to log into your account to approve each deposition for release individually. Congratulations.
Another option to creating a deposition instance
When creating a deposition, you have the option to choose “Create a new deposition from XML” to upload an XML file containing all the specifications and details of one (or presumably multiple) depositions. You’ll need to follow their XML schema, found here in .xsd and .sch formats. If that link goes stale, you can also find the schema under the “What is EMPIAR data model?” section of their FAQ.
To display 3D structural models, we use UglyMol, an open-source web-based macromolecular viewer focused on electron density.
It’s embedded within a separate HTML page that is included in posts using an iframe.
The document that the iframe inserts is located at /static/posts/uglymol/uglymol.html, which can be viewed here.
The structure to show is selected using a query string.
For example, the structure for entry 3K0N on the PDB can be inserted into any page on our site by simply including <iframe src="/static/posts/uglymol/uglymol.html#id=3k0n"></iframe>, which would cause it to look for files called 3k0n.pdb and 3k0n.mtz within the /static/posts/uglymol/ directory.
Note that the files are stored locally and not loaded from the PDB.
Further parameters can also be added, such as #id=3k0n&xyz=10,5,15&eye=90,-30,60&zoom=50, yielding the following figure:
For a concrete example, the document creating this post can be viewed here.
It, like everything else on this site, is released under an MIT license.
…is a slide during every person’s group meeting presentation about what makes you a diverse individual or a diversity topic you are passionate about. It is a quick moment at the start or end of every group meeting devoted to bringing awareness to our varied life experiences. The slide is meant to help us get to know colleagues beyond science, understand cultural differences, and develop respect for one another.
The idea was introduced to me as an undergraduate researcher at the Molecular Foundry, a national user facility at Lawrence Berkeley National Lab. Adapted from the Segalman lab, Ron Zuckermann and Rita Garcia introduced the Minute for Diversity slide to foster a welcoming community for a facility with constant flux of international scientists. In practice, it helps people feel more connected to one another by sharing something that would not normally come up in work conversation. Unintentionally, the slide also serves to get to know normally shy people and makes careers in science more accessible to younger lab members. I often find it to be the most memorable part of a person’s group meeting. It is up to the individual on how much they would like to share about themselves and whether they would like to keep it lighthearted or bring awareness to more serious issues.
A few I’ve seen over the years include:
Personal
- Stories, pictures, traditions, foods, and cultural touchstones from how one grew up by proud community members
- How to capture stunning photos by a photographer
- Restaurant recommendations by a foodie
- Travel advice on their home country by international scholars
- Beautiful ceramics by an artist
- How to check for tick bites by an outdoor enthusiast
- Videos of salsa performances by a dancer
- What to do if you are victim to a canine bite by a recently injured postdoc
- Quarantine fashion by a bored graduate student
Awareness
- Discrimination against marginalized people in STEM (Race, LGBTQIA+, gender identity, and more)
- Mental health in STEM and on-campus resources
- Open access initiatives in STEM
- Personal data privacy
- Voting
- Team building, effectiveness, and efficiency
After leaving the Foundry, I have shared the practice with the labs I have affiliated with since and plan to continue this trend as I move through my training. I highly encourage PIs and learners to introduce the Minute for Diversity slide during your next group meeting, and make it a habit for everyone in subsequent meetings. I would love to see the day that this is the norm in academia.
Examples provided below with brief context from myself and several lab mates across the various labs I’ve worked in at UC Berkeley and UCSF.
Zuckermann Lab
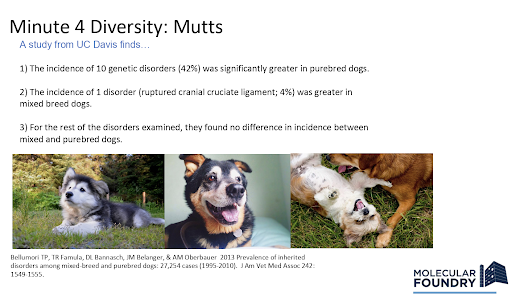
Created for a labmate who was having a bad day and “just wanted to see some puppies.” A lighthearted way to say I classify myself as a “mutt.” (NOT meant to promote eugenics!) - Leah Roe, Undergraduate Research Assistant
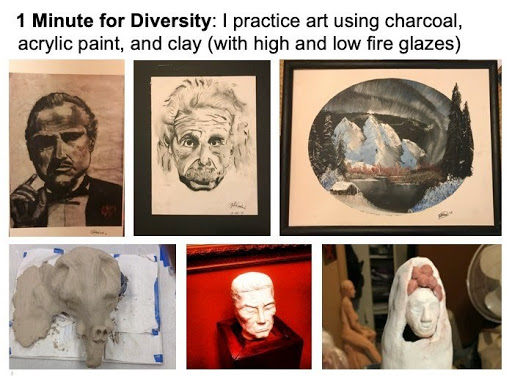
I can’t thank my mom enough for having me take art classes since I was 7. Although I seldom practice art now (I’m working on improving this), I identify greatly with it. Art has brought me joy, therapy, sadness, a break from the sciences, but also a connection to the sciences (many chemical reactions are surely driven when your pot is in a kiln). Art has helped me identify my own uniqueness and to acknowledge the grand beauty in diversity— for that, I am eternally grateful. - Joselvin Galeas, Undergraduate Research Assistant
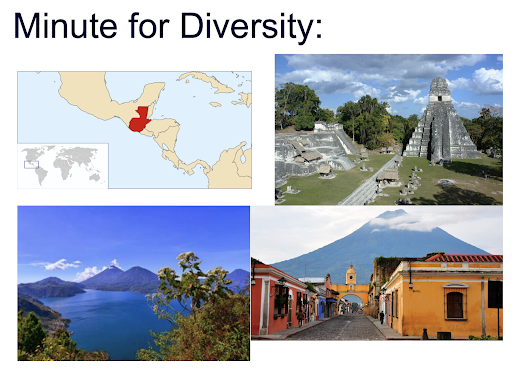
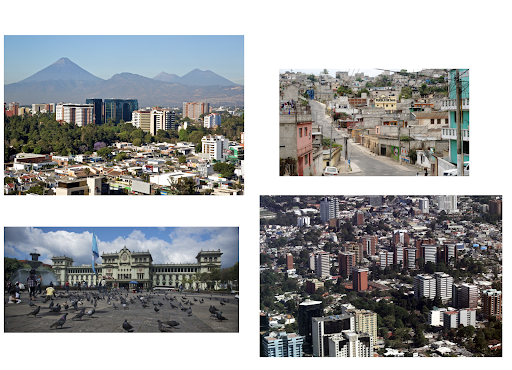
I grew up in Guatemala, which is located in Central America. I enjoyed the Minute for Diversity section in lab meeting because it gave me the chance to talk about the country I’m from. - Virginia Garda, Undergraduate Research Assistant
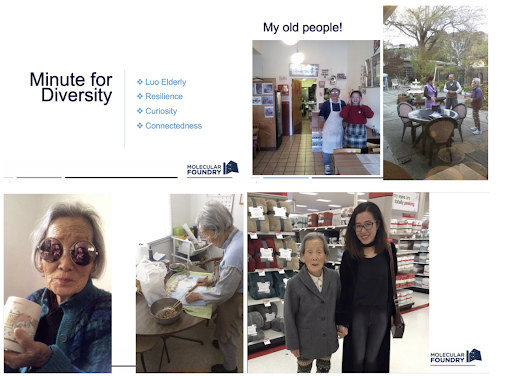
For my diversity slide, it was important for me to honor my family, in particular my parents and my grandmother who helped raise me. They taught me resilience, and supported me in taking on this research opportunity. While my dad was never allowed to go to college in China, he was always reading and learning, and I’m grateful he passed on that growth mindset to me. - Nancy Luo, Undergraduate Research Assistant
Fraser Lab
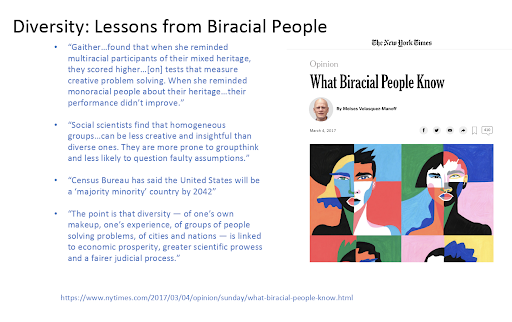
For my own biracial identity - Chinese and Ashkenazi Jewish. The article describes how diverse knowledge and teams work together to problem solve more effectively. - Leah Roe, Junior Specialist
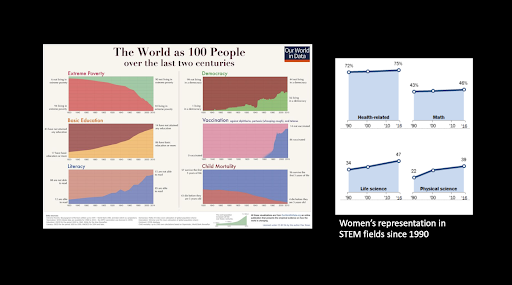
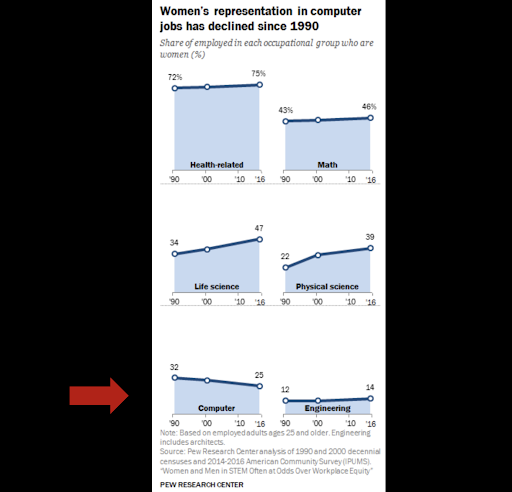
While we should appreciate human progress by broad metrics, we need to scrutinize the world more deeply to root out the inequalities that are nevertheless widespread. - Hersh Bhargava, Biophysics Rotation Student
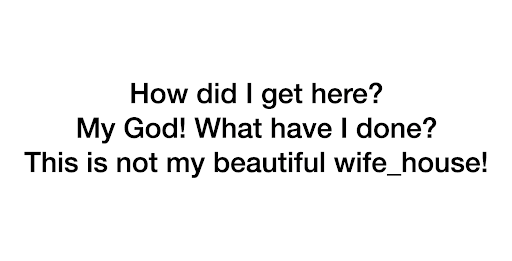
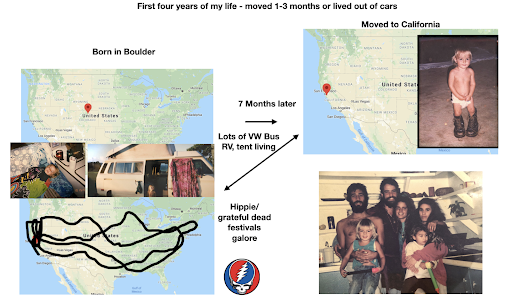
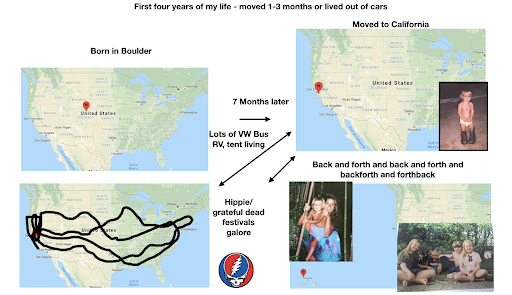
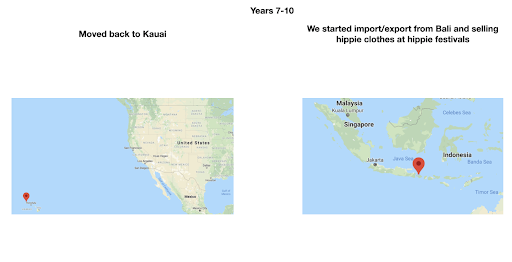
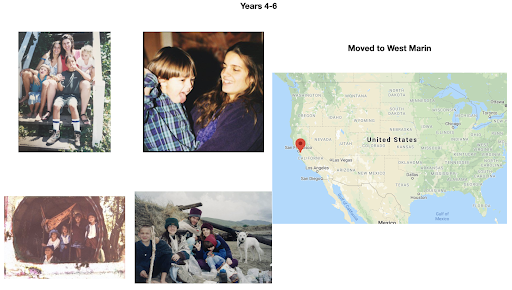

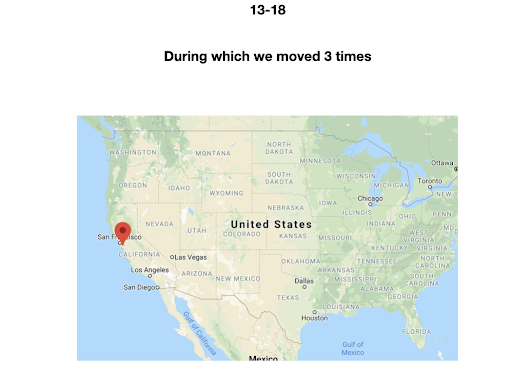
For diversity I thought it best to understand where I come from. I grew up moving every couple of years with a hippie dippie mother bouncing about from festivals, Hawaii off the grid yurts, VW buses, Italy, and Northern California woods. The slides depict the somewhat hectic bopping about. - Willow Coyote-Maestas, Visiting Graduate Student
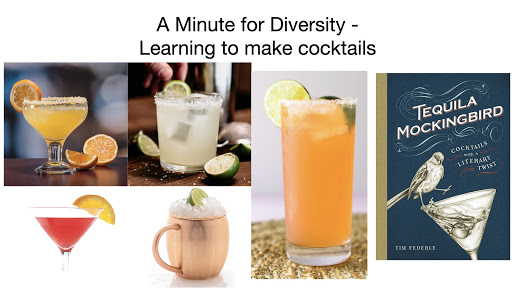
I wanted to spend my time during quarantine learning something new since I couldn’t go into lab to do experiments. So I decided to learn how to make different cocktails. - Roberto Efraín (Robbie) Díaz, Tetrad Graduate Student
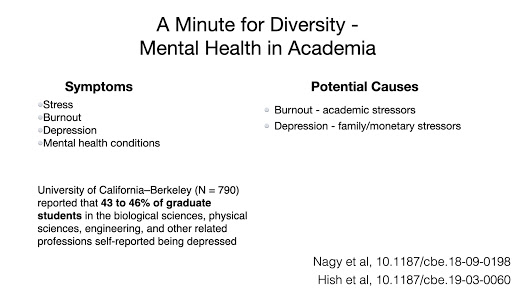
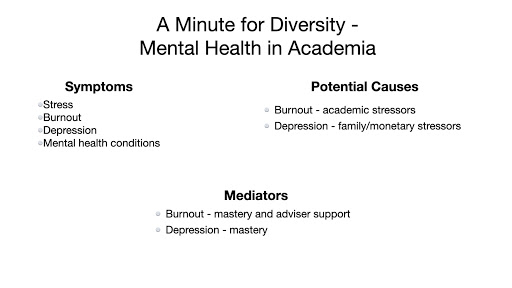
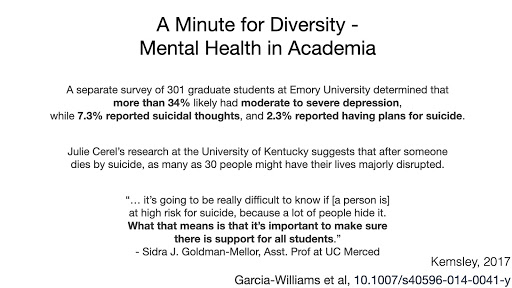
A colleague of mine died by suicide and it caused me to start thinking about how students in academia feel, especially marginalized students. It prompted me to look at the literature about how we can overcome feelings of burnout and depression. - Roberto Efraín (Robbie) Díaz, Tetrad Graduate Student
If you are in need of mental health services or are in crisis, please reach out to Student Health and Counseling Services, Faculty and Staff Assistance Program, or Mental Health Board of San Francisco for immediate assistance.
Bondy-Denomy Lab
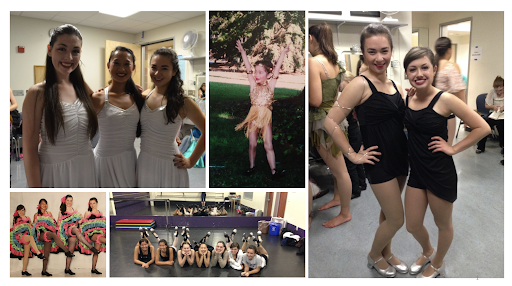
A lifelong hobby - Tap dancing! It became an outlet for stress as I grew up. I also helped teach the PE tap dancing classes at UC Berkeley while I was an undergraduate. - Leah Roe, Junior Specialist
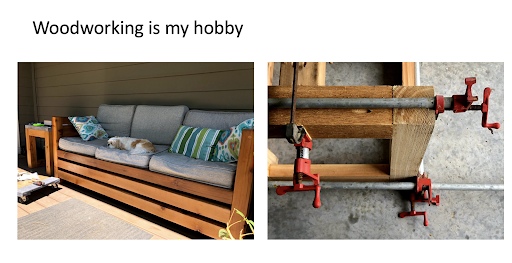
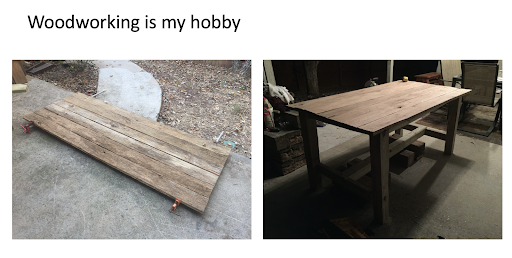
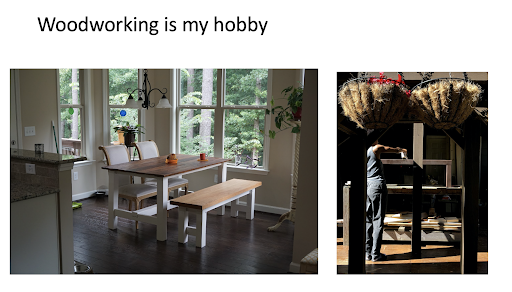
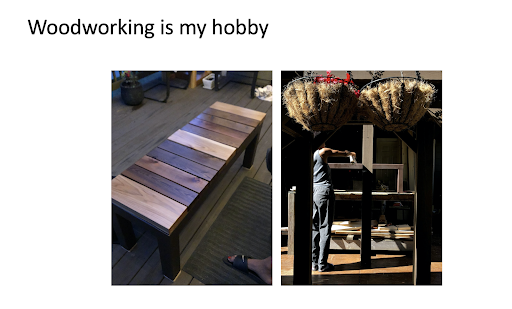
I learned woodworking in high school and used it as an outlet before I started grad school. I learned how to make indoor and outdoor furniture and my family dinner table is one of my projects. - Matt Johnson, Bioinformatics Graduate Student

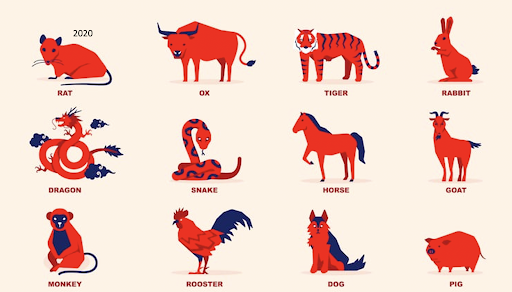
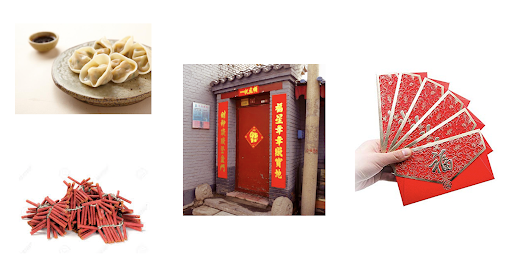
The Spring Festival or Chinese New Year is approaching. According to the Chinese Zodiac cycle, 2020 is the mouse or rat year. Next is the Chinese Zodiac cycle that circles every12 years. Calculate what is your zodiac animal. Some traditions for Chinese New Year. Dumplings! It is more of a culture for northern Chinese, but not so much for southern Chinese actually. In some areas of China, people eat rice cakes or sticky rice balls with fillings (called Tang-Yuan) in Chinese New Year Eve. People set off firecrackers on CNY Eve and the morning of the new year. Traditionally, firecrackers were thought to scare away a monster that comes over during new year. “Chun-Lian” or Spring Festival Couplets are good wishes written on red papers and taped/glued around the doors. Some of the wishes are taken from ancient Chinese poetries. Even if not, they are often written in a poetic way. Lastly, lucky money!! Chinese culture (or east asian culture in general) values seniority. On CNY morning, we often visit our grandparents to “Bai-Nian” by saying good wishes and bowing to them, for instance wish them longevity and good health. In return, they give us lucky money in red envelopes to bless us a prosperous year. - Yuping Li, Postdoctoral Fellow
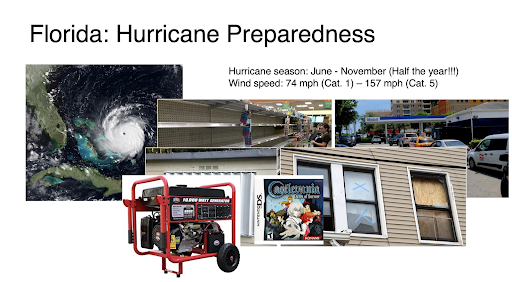
Here, I show my California-based lab mates about how we prepare for hurricanes in Miami. Growing up, my parents and I would stock up on food and gas early to avoid price scalping and long lines. We would also install proper shutters, avoiding the unreliable “X” tape method. Though we never had an electric generator, this is a popular appliance for many during hurricane season, as the power will certainly be cut! - Senén Mendoza, Tetrad Graduate Student
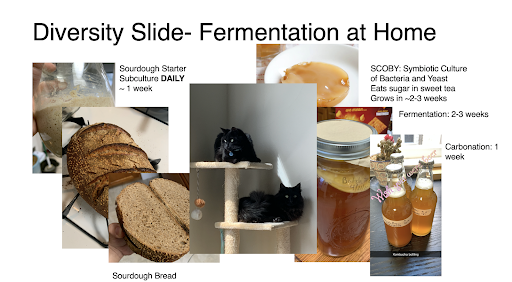
Here, I show off my quarantine hobby: fermentation. On the left side, I educated my labmates about the process for growing a sourdough starter from scratch and I show some of my mediocre results. On the right, I show my kombucha project, involving making a fresh SCOBY from scratch and preparing subsequent ferments for a tasty and refreshing treat. None of these experiments would have been possible without my assistants Salem and Lincoln (in the middle)! - Senén Mendoza, Tetrad Graduate Student
If you are starting a new lab or want an easy (democratized) way to run your lab website - please: Clone this website!
The Fraser lab website was built by Ben Barad 6 years ago using Github Pages. Since then, it has been improved upon by many members of the lab, and has been updated over 1000 times by James.
We love our lab website because it is so easy to use and update. Updates are done in markdown, which is very easy to learn. As part of on-boarding, new members add their own bio and picture. This also serves to teach people git and to get comfortable with the idea of modifying, breaking, and fixing the website! The publications page is particularly powerful with easy formatting based on IDs for Pubmed, the Protein Data Bank, BioRxiv etc. Similarly the members page makes it easy to add accounts for Twitter, github, and other services. We keep adding more features. For example, Jen will be adding alumni links for lab websites or LinkedIn pages in the near future!
In keeping with our lab principles on sharing, we decided from the beginning to share it with a permissive open source license, so that others in the community are able to copy and modify it to make their own lab websites. We’re glad they have!
Quite a few people have made websites based on the original Fraser Lab template, with varying degrees of customization:
Sites Ben Made:
Sites other people made (in no particular order):
Have you made a website using the Fraser lab or one of these sites as a template? We’d love to add yours to our list!
So what do I do to make my own?
Recently, our lab website has gone through some significant ugprades. These include moving to collections for most things instead of using the _data folder, moving to a CDN to load large files, and support for structure loading with UglyMol. This guide predates these, and while it is relatively easy to copy the website still, for this guide we recommend taking a copy of one of the releases we made before incorporating these edits: https://github.com/fraser-lab/fraser-lab.github.io/releases
- Fork this Github repository (or one of the ones others have made - just make sure it has a license to do so!) to your own organization, and rename it to
organization_name.github.io - right away, you’ll start seeing a website appear at that URL! Optionally, download the site, and try building it using the instructions in the readme so you can edit locally. Either way, delete the current CNAME file, which points to https://fraserlab.com. Once you’ve done this, the website will start showing up automatically at https://organization_name.github.io - no further hosting or configuration required.
- Update the license - you can choose not to relicense your site if you don’t want others to use it as a template, but you need to include a copy of the Fraser Lab license somewhere (can be in an
external folder)
- Change the readme,
config.yml and news.xml files to be your lab’s name!
- Update
_includes/header.html and _includes/footer.html for your website! In particular, change the university brand image and link in the header, and the link in the footer.
- Remove all the Fraser lab’s images and PDFs from the
static folder, and put in member photos, key images/PDFs for papers, and any extra images that you want to use on your site.
- Remove all the posts from the
_posts folder and write one or two of your own!
- Remove any extra pages that you don’t intend to use (in particular, Fraser lab has many pages related to different UCSF classes) by deleting the folder with the respective name. The minimum folders you probably need are
_data, _includes, _layouts, _drafts,_posts, publications, research, members, static, and maybe news and join.
- Update
index.md to change the homepage! You can change the image in _layouts/home.html. Change the sidebar on the homepage at _includes/sidebar.html
- Go into
_data and do the following:
- Replace entries in
members.yml and alumni.yml with your own members and alumni!
- Replace or delete
sep.yml and visitors.yml based on your needs - do you have visiting scientists or undergrads/high school students to list?
- Update
navigation.yml based on your needs - this controls what is in the navbar at the top of each page.
- Replace entries in
publications.yml with your own publications.
- Update the members page photos by changing
_layouts/members.html. Update the members page sidebar by editing _includes/alumni_sidebar.html.
- Update the research page at
research/index.md. Similarly update any other specific pages by editing the index.md or index.html file in each folder.
- Either update disqus to your own account at
_includes/disqus.html, or remove it at _layouts/post.html if you don’t like comments on your posts.
- Remove
sitemap.xml and optionally make another one of your own.
- Replace
favicon.ico with one of your own!
- Add a custom domain using Github’s instructions
- Edit styles in
static.css and _layouts and _includes to customize the site to your heart’s content!
Once I have my own, how do I edit it?
For a new publication, just upload a photo and PDF, then update the _data/publications.yml file. Similarly, for a new member, just update _data/members.yml. New blog posts can be made by adding a new markdown file in _posts